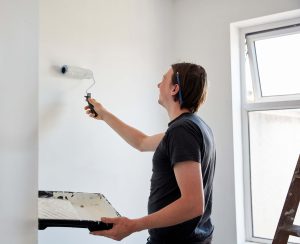

When you paint your home, you’re hoping to improve its aesthetic value. It stands to reason, then, that taking the time to understand how a professional would do the job is well worth your time. This is especially true for molding or trim, which can be difficult to work with. In this article, we’ll break down what you need to know to get professional quality results with DIY affordability.
Proper Preparation
If not prepared properly, the paint won’t adhere as well as it should. If it doesn’t look bad right from the start, it will as time goes by and it begins to wear prematurely. Proper preparation is effectively a three-step process:
- Cleaning: Clean the surface thoroughly to ensure the paint gets onto the trim itself. Let everything dry completely before continuing.
- Sanding: Running fine sandpaper over the trim creates a rough surface that’s easier for the paint to adhere to.
- Priming: A layer of primer can mask stains or dark-colored paint and create a better surface for the paint itself to stick to.
Choosing the Right Supplies
With the area ready for paint, you can get started painting. To get the same results professionals do, you have to use the same tools they would.
- Paint: Your choice of paint can make a big difference. Ask the professionals at the hardware store which paint is right for your application.
- Brush: Using a small, angled brush will give you better control and allow you to reach the tight spaces often encountered while painting trim.
- Tape: Professionals always use masking tape to make sure paint only gets on the trim. To get the results they do, you should too.
- Rag: Often overlooked by DIY painters, a damp rag can help you immediately fix drips, overlaps, and other mistakes.
Painting Techniques for Pro Results
Professionals don’t simply slap on the paint haphazardly. Now that you’re using the tools the professionals use, it’s time to learn the techniques that they use to get the high-quality results they do. A key factor here is that you take your time and do the job right. This will save you time having to fix mistakes or repaint the trim sooner than you’d otherwise have to.
- Start with edges: Professionals use a technique called “cutting in.” To use this technique for yourself, simply start painting at the edge of the trim and work your way to the center.
- Use long, steady strokes: The goal is to get the paint on as evenly as possible. Long, steady strokes reduce the chances of brush lines forming. Paint as long a stroke as you can and still keep the brush consistently wet throughout.
- Apply multiple thin coats: Rather than slap on one thick coat, apply the paint in multiple, thin layers. This will result in a more even finish and reduce the chance of dripping. Let the paint dry fully between each coat.
- Avoid drips: Painting with thin coats can help minimize drips. But even professionals have a drop every now and then. If they do occur, a very light sanding before the next coat will smooth them out.
- Sand between coats: A quick sanding between coats isn’t just good for removing drips. It’s also a great idea in general, as it ensures the surface is prepared for the next coat of paint.
- Dry completely: Ample drying time between each coat and before you pull the masking tape back to complete the job will provide you with the best, most durable, finish.
Let Builders Guide You
At your local Builders, you can shop for paint and painting supplies, getting the best brands available to you. But you also get a knowledgeable staff, ready to help you determine which paint you should use, helping you match colors perfectly, and providing whatever other advice your project may require.